

YouTube Music offers an exciting feature allowing you to create and customize your playlists. These playlists are personalized collections of songs that reflect your musical tastes and preferences. In this article, we will guide you through the simple process of making a YouTube Music playlist. We'll also explore the advantages and disadvantages of downloading YouTube Music playlists for offline listening while presenting you with an alternative method to export your playlists from YouTube Music effortlessly. So, let's get started and discover how to make the most out of your YouTube Music experience!
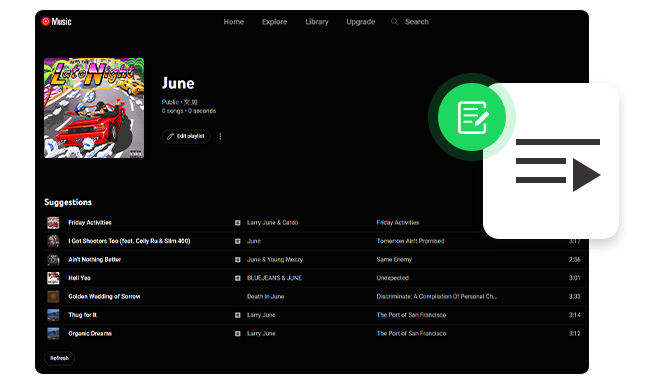
YouTube Music provides a dynamic platform for music lovers to explore and enjoy their favorite songs, artists, and genres. One of the standout features of YouTube Music is the ability to create personalized playlists. By making a playlist on YouTube Music, you can tailor your music listening experience to your exact preferences, moods, and occasions. And any YouTube Music user, whether you have a Free or Premium account, can create playlists.
Step 1 Visit the YouTube Music website or launch the YouTube Music app.
Step 2 Sign in to your YouTube account.
Step 3 Explore the vast music library and find a song you want to add to your playlist.
Step 4 Next to the song title, click on the three-dot menu icon.
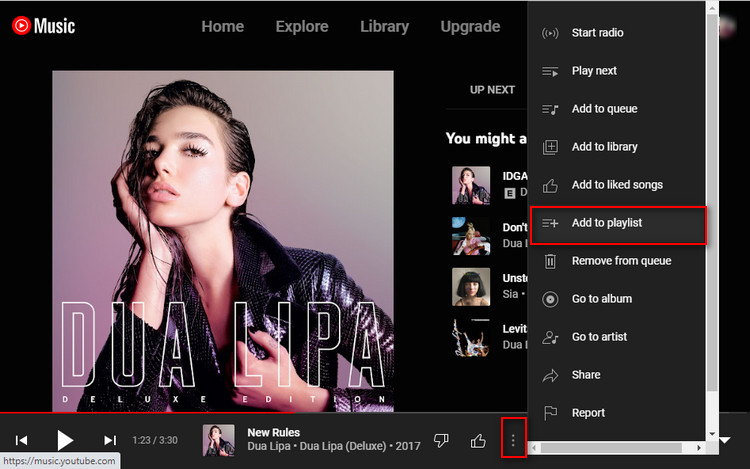
Step 5 From the options that appear, select "Add to playlist."
Step 6 Choose an existing playlist or create a new one by selecting "New playlist" and providing a name.
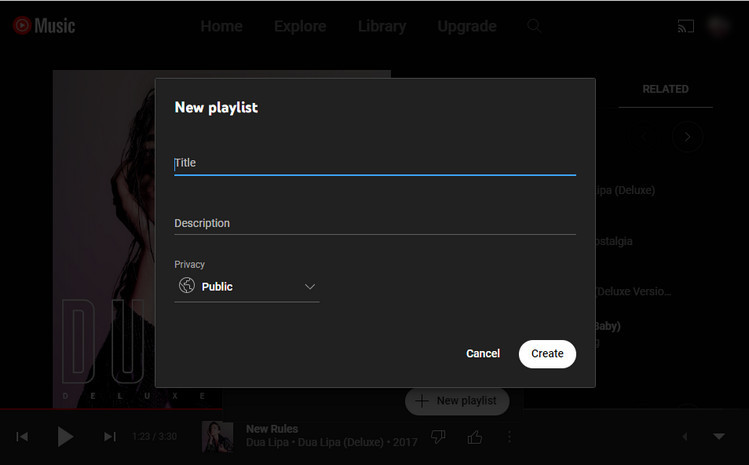
Step 7 If you already have existing playlists, choose the playlist you want to add the song to. Otherwise, select "New playlist" and give it a name.
Step 8 That's it! You've successfully created a playlist on YouTube Music.
Tips: To rearrange the order of the songs, simply drag and drop them within the playlist.
Once you have finished adding songs to the new playlist, you can access your playlist anytime from the "Library" tab in the YouTube Music app or the left sidebar on the website. Enjoy listening to your curated collection of songs.
After learning how to make playlists on YouTube Music, let's explore another exciting feature: downloading playlists from YouTube Music for offline listening. This feature allows you to enjoy your favorite music even without an internet connection. In this section, we will discuss the advantages and disadvantages of downloading YouTube Music playlists for offline listening.
One of the major advantages of YouTube Music is the ability to download albums and playlists for offline listening. This feature allows you to enjoy your favorite music even when you don't have an internet connection. Here are some benefits of downloading YouTube Music playlists:
While downloading YouTube Music playlists for offline listening offers many advantages, there are a few limitations to consider:
While YouTube Music restricts playlist downloads to its Premium subscribers, there is a reliable alternative for users who don't have a Premium subscription. NoteBurner YouTube Music Converter is a powerful third-party software that enables you to download YouTube Music playlists without the need for a Premium account.
NoteBurner YouTube Music Converter is a professional YouTube Music Playlist Downloader designed to convert YouTube Music playlists to MP3, AAC, WAV, FLAC, AIFF, or ALAC with lossless audio quality. Whether you are a YouTube Music Premium or Free user, this tool allows you to download tracks from YouTube Music effortlessly on both Windows and Mac computers. With the converted files, you can store your favorite YouTube Music tracks on your computer indefinitely, transfer converted YouTube Music to USB or SD cards, or even import them into other popular streaming music services like Apple Music, Spotify, Amazon Music, Deezer, and more. Additionally, NoteBurner YouTube Music Converter also supports downloading music videos from YouTube in MP4 format.

Step 1Log into YouTube Music
Open NoteBurner YouTube Music Converter on your PC or Mac, and then log into your YouTube Music account.
Note: NoteBurner needs to work with a YouTube Music account but it will never take any other information from your account other than the songs.

Step 2 Choose MP3 as Output Format
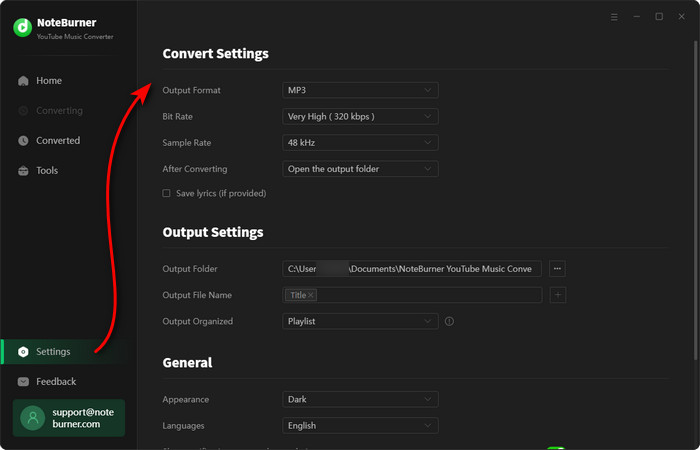
Once you’ve logged in, click on the "Settings" icon at the bottom left corner. Then you can customize the Output Format (MP3/AAC/WAV/FLAC/AIFF/ALAC), Bit Rate (320kbps, 256kbps, 192kbps, 128kbps), Sample Rate, and so on. Here we suggest you choose the output format as MP3.
Step 3 Add YouTube Music to NoteBurner
Simply open one of your YouTube Music playlists on NoteBurner, then tap the "Add" button suspending at the bottom right. Select the music tracks you'd like to convert.
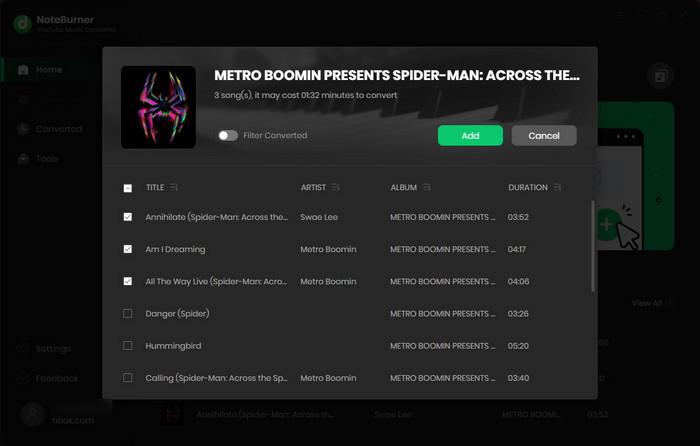
Step 4 Start Converting YouTube Music to MP3
Tap on "Convert" to start downloading and converting YouTube Music as MP3 files.
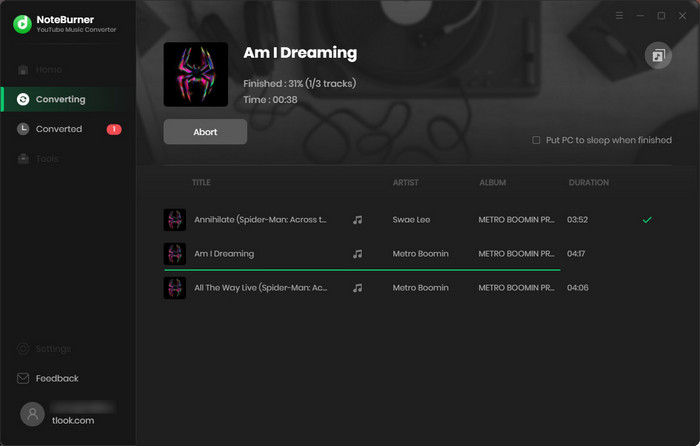
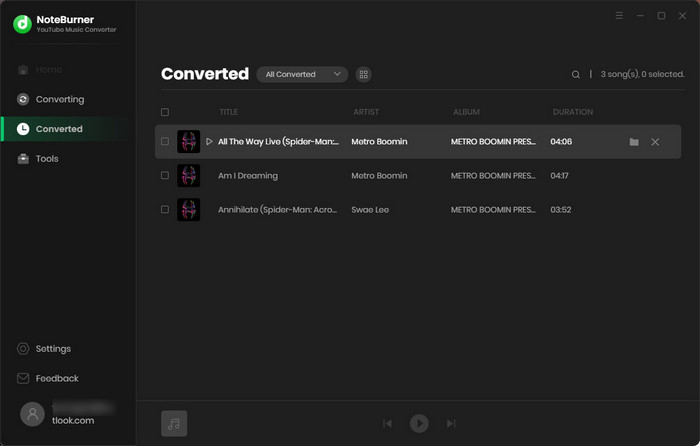
Once the conversion is done, go to the "Converted" tab in the left to check the downloaded history of YouTube Music. And click the "Folder" icon beside the song to locate the YouTube Music files.
YouTube Music offers the ability to create personalized playlists, tailoring your music listening experience to your preferences. The platform also allows you to download playlists for offline listening, providing convenience and saving on data usage. However, there are limitations such as limited offline availability and storage space occupied by downloaded content. To overcome these restrictions, NoteBurner YouTube Music Converter provides an alternative solution. It allows you to convert and export YouTube Music playlists to MP3 format on your computer, granting flexibility in enjoying your music. Whether you have a Premium subscription or not, NoteBurner offers a unique way to maximize your YouTube Music experience.
Note: The free trial version of NoteBurner YouTube Music Converter allows you to convert the first 1 minute of each song. You can buy the full version to unlock this limitation and enable all its features.